Showing posts with label process. Show all posts

Tuesday, 19 November 2013

Mounting.

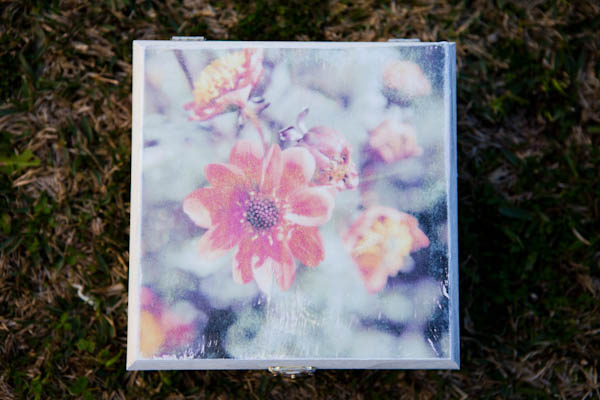
I had my ten portfolio shots printed through RGB Digital (as I had used them before and loved them) simply on glossy paper, and over the weekend decided that it was finally time to mount them. 

I had looked around at different places offering mounting services, offering the stuff so that you could do it yourself, but it was all pretty expensive - and I'll be the first to admit that I am a poor student. A job is only good so long as you are getting the hours you should be. So I went back to another website that I had used in the past and loved, FrameShop.com.au, to see what they could offer me. 

I had bought 3mm self-adhesive foamcore through this place many years ago, so I figured I could at least get that from there. So then wasn't I surprised when on their home page, they were offering six-packs of front mounting boards, pre-cut to your desired size? 

I ordered two of the six-pack mounting boards, at 11x14' to fit a photo at 8x10, along with ten 3mm thick non-adhesive foamcore boards, at 11x14 - all of this was ordered in white. What I received was all of my mounting boards, and twelve foamcore boards at 5mm thick. I saved $11 in getting those two free boards, and the 5mm foamcore is likely not to bend like my old 3mm has. So, I guess I can't complain! 

All up, including shipping to the Sydney metro area, this cost me $130. Not bad, considering the other prices that are out there. 

Once I had all of this, I just decided to stick everything together with double-sided tape. Honestly? So that I could re-use the materials if I wanted to. Because not all of those shots are fantastic, and I know I won't sell any of them. But I can use those materials to frame family photos are art photos to give as gifts, and then I feel like they're being useful.

Two weeks; four days; six classes; that is all we have left of TAFE for this year.

Thursday, 7 November 2013

Printing To A T-Shirt.

For my assignment, in which I used my image for The Angel Of Vengeance, I did end up printing onto a t-shirt. 

It was fairly straightforward, and cheap. I've had transfer paper sitting in one of my draws for several years, but the same product can still be picked up from anywhere around $20, and I bought two black t-shirts from a local store (they were two for $5). They had to be black, because my transfer paper was for dark fabrics. 

After that, I just followed the instructions provided with the paper itself. Slip a sheet into the printer and print the image onto said paper. Allow it to dry for thirty minutes. 

Take the t-shirt and place it on a hard service (not an ironing board!) and then iron it to make sure it's flat. Allow it to cool. 

Peel off the backing paper of the transfer, and place the image where you want it on the shirt. After that, you cover it with baking paper and iron it on for about a minute. (You never iron it without the baking paper, as this will damage both the image and the iron!) 

And that was that. 


My attempts were not perfect, but they weren't bad, either. Overall, I was very happy with the end result.

Sunday, 20 October 2013

The Angel Of Vengeance: Coming Together.

I've been working on The Angel Of Vengeance book cover/poster/whatever it is, and I'm liking the way that things are going so far. I took what I have so far to class on Wednesday, to ask Ben whether or not it would be suitable as my assignment, and he said I was on the right track. So that's a good thing. 

In the spirit of being more open with my work, like last time, here's some insight into what I have so far. 

These are the images that I started out with: 

Yes, even the text was a photo! I also used two pictures of the sky (with clouds) as the background for my image, but they're on a different hard drive and therefore not accessible to me at the moment. But every photo is mine, was taken by me, etc. 

Put together, here is what I have complied so far: 


I'm not quite ready to call it done yet, though I don't know what more I might be adding to it.

Wednesday, 9 October 2013

Tilt-Shift Effect In Photoshop.

Today we looked at how to achieve the tilt-shift effect using Photoshop - which is obviously a hell of a lot cheaper than doing it with a $1,200+ lens, and probably a little more professional than doing it in Instagram. 

It's also really simple to do - load your image into Photoshop, go up to Filters, go to Blur and select Tilt-Shift. Then just go nuts! 


I didn't have any suitable images to work on, so here's one I borrowed from Google:

Before (Upper) and After (Lower).

Wednesday, 28 August 2013

Black and White: How Do I Love Thee? Let Me Count The Ways.

Today's theory lesson had us looking at different ways to convert an image to black and white - which I found interesting, because who doesn't love a great black and white shot? I was, however, not thrilled to discover that the way I had been doing it was probably the worst. 

When I convert to black and white in Lightroom, I most often do this by entirely desaturating the image. I do this because most of the time it looks better than what you get if you just click "black and white", and I try to avoid the presets. I've never had much of an issue with it, except on occasion. Sometimes I wished there was a better way to do it. 

Then today, we did it using colour channels in Lightroom, and that changed everything. 

Through experimenting with this, we were asked to take one image and create two different versions of it - both black and white, but both with different moods. 


Same shot, different versions. It's truly amazing what you can do.

Sunday, 11 August 2013

Printing Onto Wood.

As stated in an early entry, I decided that for my assignment I was going to print an image onto wood. 

Some problems that I expected to run into while doing this assignment were: 
  • most people said that you couldn't use an Inkjet printer for this process, but not having access to a laser printer, I decided to attempt using my Inkjet;
  • I expected to have trouble working out how much of the gel medium I was going to need to use; 
  • I expected to have issues with rubbing off the paper, because I felt I would end up rubbing off the ink as well; 
  • I decided to attempt this in colour, when I had only read tutorials for black and white - as such, I wasn't sure that the colours would come out, which would result in a very faded photograph or no image at all.
Let's start with the process. First, my equipment: a wooden box, white acrylic paint, Matisse Gel Medium, an Inkjet printer, a paintbrush, a roller, and my image. 


This was the photograph I chose to use for my assignment. It's a picture of my mother's dahlias, where I have edited the colours and sharpness to give it more of a pictorialist look. A soft focus and wider aperture were also used to achieve this.

These photographs showed my first attempt at this assignment, which didn't go quite according to plan, but is exactly the same as what I did the second time around bar one thing: the first time around, I painted the box in full before printing the photo to the lid. The second time, I only coated the top part of the box in paint. We will see why shortly. 


One everything was ready, I applied the gel medium to the top of the box in an even layer. The first time I did this, I used a medium sized paint brush and didn't take much notice of my speed. The second time, I used a larger paintbrush and did this quickly, so that the gel medium would all remain wet before the image was applied. 


Once applied, the image and the gel medium were left to dry overnight. Once it was done, I ran the paper under running warm water and began to peel away as much as I could. 

The first time I attempted this, this was where things started to go wrong. I didn't know that acrylic paint became slippery and began to come off once it was wet. As such, I ended up getting paint all over my hands and my image began to rub off in places that I didn't want it to. 

The second time, the rest of the box was paintless while only the side that held the image had been painted. I also used cold water this time, and achieved the effect I was after. 

Overall, I am very pleased with the way my assignment came out: 


This was finished by applying acid free Mat Spray to the image to protect it.

I quite enjoyed this, as it was both fun and rewarding. I can see myself doing this a lot in future, as such things make for great gifts. Overall, it didn't cost too much either. From the Riot! arts and crafts store that I got all of my materials from, I spent $10 on the box, $10 on a container of paint that still has most of its contents, and $15 on the gel medium while is also still mostly full. Paintbrushes were pre-owned and the roller was $2.

Saturday, 27 July 2013

The Brenizer Method.

In Wednesday morning's theory class, we learned how to use the Brenizer Method to create wide-angle photographs with the depth of field that is usually associated with either tilt-shift or telephoto lenses.


The method involved taking a series of shots, while keeping the film plane/sensor of the camera in the same place. 

First we focused on our subject, to make sure they would be sharp within the image, before switching to manual focus. A long focal length (preferably over 100mm) and a wide aperture (f/2.8 or wider) were used. 

Using this method reminded me of the joiners that we saw while studying Cubism. Making the image required taking several shots of the scene and then merging them together in Photoshop (we did this by using Lightroom's "merge to panorama in Photoshop" command). The difference here is that it looks like a straight image, as the eye sees it, as opposed to an image filled with different perspectives as you would get with a joiner. 

I was unsure about this method at first, but really came to like it - after realising that I had used it before without even knowing it!

I can definitely see myself using this again in future, a lot.

This method is particularly good when you need an image of great size and resolution.

Thursday, 18 July 2013

Printing Onto Wood.

After my last experiment with using an inkjet printer to print onto contact paper failed, I figured I would give using an inkjet printer to print to wood a go - it seemed like an interesting thing to do, given that a majority of tutorials and blog entries I found said that it wouldn't work.

I found a YouTube tutorial where the creator said that she and her sister both used an inkjet printer. Much to my surprise, it was basically the same as every other "don't-use-an-inkjet!" tutorial I had seen: apply a gel medium to the wood, place the print ink-side to the gel, let it dry over night, then remove the paper under running water. 

Obviously, I had my doubts. 


For my test run, I didn't bother leaving it overnight. I let it dry for a few hours and then started the process of removing the paper. As a result, some of the gel medium hadn't dried properly. I ended up rubbing some of it off and getting holes in my image! 


I let the wood dry a few times, and always felt like I still hadn't removed all of the paper. Even now I'm not so sure that I've removed all of it, but I do think that it leaves quite an interesting effect. And either way, I have achieved using an inkjet printer to print on wood! 


The next step is to take a photo to use for this assignment, and then to print it to my wooden box. At this point in time, I'm leaning towards pictorialism as a movement, because printing to wood gives some lovely, old-looking effects that will go well with this.

Sunday, 7 July 2013

Inkjet Printers and Contact Paper.

Although I haven't decided on a photo for it yet, I've been thinking on part two of the assignment and decided that I either want to print on glass or wood - because I love the look of both. 

The catch is that I didn't want it to be expensive, and it needed to be something that I could do at home - so the collodion method was out of the question. With that said, I came across a tutorial that would essentially enable me to make a sticker out of one of my photographs, so that the sticker could then be applied to glass. 

Not exactly printing on glass, but it looked like fun regardless. 

The only problem was that these prints need to be made using a laser printer, as those use toner instead of ink. I decided I would try with my inkjet anyway - I don't currently have access to a laser printer, and I wanted to see if inkjet would work anyway. 

It didn't. 

I printed a high contrast black and white photograph onto plain paper and then stuck a sheet of clear, self-adhesive contact to it - with the ink side of the photo meeting the adhesive side of the contact. I let it dry for a while and then put it into warm water, where I then left it to soak for ten minutes. 

After that you're supposed to rub the paper off the contact, and the photograph is supposed to be left behind. But for me, the ink simply washed away and I was left with a blank sheet of contact paper. 

I plan on trying it again when I have access to a laser printer, but my next experiment will be with wood.

Sunday, 12 May 2013

Linger: Some Final Thoughts.

Today I printed my assignment. Right from the start I knew that I just wanted to do a simple print for my first assignment, both because it would be easier and at this point in time it is just more cost effective for me. I would leave more interesting presentation thoughts for parts two and three of this assignment. 

I printed my black and white photo on some Ilford Galerie Smooth Lustre Duo instead of the usual glossy papers that I would use, because I might preferred the look of the smooth lustre. For presentation to the class, a bigger size might have been better, and I feel I've let myself down by not thinking of this beforehand. This is something to keep in mind for future assignments.

I have permission from both of my models to use my shot for portfolio work. As this was all that I needed it for, that was all that mattered to me.

What would I do better next time? 

Honestly? Everything. I didn't get the exact shot that I was hoping for, so next time I would do more than one photo shoot with the same model. I would do the first shoot, look at my shots and decide on what needed to be changed, then do the second shoot - and keep going until I got exactly what I was looking for. I would also remember to take my shot-list with me to the shoot, because I feel that this would have helped me greatly. 
In terms of the photograph itself, next time I would choose a better location, use a later time of the day, and use either fill-flash or a reflector to get some more light into my model's faces. I feel that this is where I lack in a lot of my portraits - I can just never get my outdoor lighting right, and my subjects always seem to lack the light and contrast that I'm always after. 

As already stated, in terms of printing I would print bigger than the A4 shot I have now, and perhaps print on canvas. Canvas is something that I haven't ever printed on, though I absolutely love the look of it.

Saturday, 11 May 2013

Linger.

This morning I had the photo shoot with Gabby and her boyfriend - and despite thinking that I was as prepared as I could be, I still managed to forget my shot-list at home. Sadly this meant that I only made half the shots that I intended to, but I still managed to get one that I'm fairly happy with. 

Although on occasion I'm still tossing up between this and the previous shot of my best friend in the cemetery, this is currently my final shot: 


My original idea was to have a couple, one of whom was a ghost - young lovers who were separated before their time. The girl might have died in a car crash or some similar, tragic circumstance. I pictured her, transparent and hardly there at all, reaching out to comfort him from the grave; him staring into her eyes, knowing she was there - feeling her, even if he couldn't see her.

That was this shot: 


It didn't turn out quite how I pictured it, so I didn't end up liking it all that much in the end. If I were to shoot it again, I would definitely have them further away from the bush - to render it out of focus and have it less distracting, and maybe have them standing - shoot from the waist up. Definitely make it more intimate. I don't feel that the story really came across here, and that is important to me. 

So back to my final shot. It had the same story behind it, originally - the girl was dead and the boy was mourning her loss. In this one, he definitely didn't know that she was there, watching over him while he stared into the distance. But when I look at the shot now, I see a different story. I see a murderer being haunted by one of his victims - though he doesn't quite know it yet. It's the beginning of a horror story. 

To achieve the way that she looks like an apparition, I used a double exposure. 


As you can see, there is one shot with Gabby in it and one shot without. With my previous assignment attempt, I layered the photos together and simply lowered the opacity of the one with my friend until I got the result that I wanted. But with this one, I didn't like the way the shot looked when Gabby was completely faded.

So for this shot, I layered the two photos together and then used a layer mask to erase the parts of the top photo that I didn't want - a gradient was used to give Gabby's legs their faded look.

I prefer the photo this way because I like that at first glance, people might not notice the oddity. And in horror stories, that is quite often how things go - you don't realise that the ghost is a dead person right until the end, when it's already too late.

Sunday, 5 May 2013

Ethel.

Yesterday my friend and I took an afternoon trip to Rookwood Cemetery so that I could attempt to get a decent shot for my assignment. 

My idea was simple. I wanted her to be a ghost, lingering behind in the cemetery even after she was "gone" from our world. So we traveled around to different sections in search of the perfect lighting and the perfect setting. 

The first shot I took was one in the Russian section of the cemetery; she was standing in a gazebo-type monument, and you could see all the graves behind her. But in the end, the shot just didn't work for me. The atmosphere was all wrong, and it was far too bright. 

Another shot I did was of her walking towards me between two rows of graves - so she wasn't attached to any one of them in particular, she was just "wandering". I feel that this shot might have been acceptable to me if only the two rows of graves had been closer together. As it was, the photo had too much sky, too much grass, and not enough subject. 

It was the middle shot that worked for me. 

To me, the atmosphere here feels right. She looks sad, she looks somewhat lost, and we even managed to find a girl's grave where the age was right - Ethel Francis died when she was twenty-three. The only thing off here is that she died in 1908, and my friend is clearly dressed for the twenty-first century. 

The process for achieving this photo is simple, but effective. I took two shots of the grave - one with my friend in it, and one without her in it. Then I layered them over the top of each other until they were perfectly aligned and lowered the opacity of the layer that contained my friend. The original shot had a washed-out sky, so I also added some more interesting clouds. 

Obviously, this wasn't exactly the shot that I had in mind. I couldn't find anybody else to model for me, so I only had my friend to work with. 

But even after the shot was done, I kept playing with the idea. And now I have another shoot scheduled for Saturday with another of my friends and her boyfriend, so I'm going to spend some time really planning out that shoot, looking for a location with the perfect light and fine-tuning the idea. Hopefully I will come up with something better - if not for this assignment, then for my portfolio at the end of the year.